[ Log In ]
[ Register ]
The all metal ESTOP push button switch main image The diameter of the threaded portion of the all metal push button ESTOP switch The hole for the mounting of the push button estop switch should not exceed 23mm Max panel thickness for all metal estop push button switch The back of the estop switch with the three leads NC, NO and C
Price Options Your Cart
All Metal Small ESTOP Switch
$13.99
Introduction:

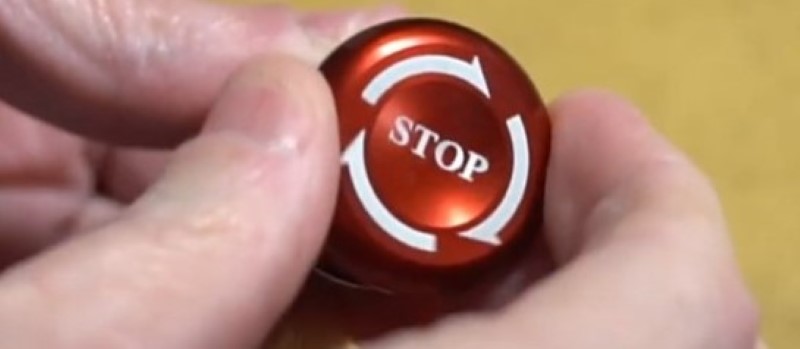
In the event that your CNC Machine goes rogue and seems hell-bent on self-destruction, consider this lifesaver: an all-metal emergency stop button. It's equipped with three leads, compatible with both NC (Normally Closed) and NO (Normally Open) configurations. To halt the chaos, just give it a push; a twist will set things back in motion.

Description:

Enhance your CNC machine's safety with our robust Panel Mount Emergency Stop Switch, designed for easy integration and reliable performance. This switch features a distinctive mushroom cap button that activates with a firm press. To reset, simply twist the button in a clockwise direction, following the clearly marked arrows. This action triggers a mechanical release, allowing the button to snap back into its original position.

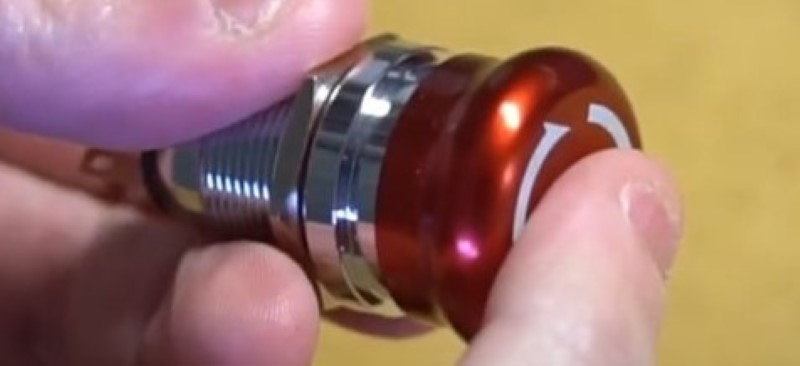
Installation is straightforward: prepare a panel hole measuring 3/4 inch or 19mm in diameter, ensuring it does not exceed 23mm or 0.9 inches. The switch securely attaches to the panel using the included nut. An o-ring accompanies the package, ensuring a tight seal against dust and moisture ingress, and also acts as a cushion to dampen the impact of a hard press, a common occurrence during emergency stop scenarios. This feature is essential for maintaining the integrity of your CNC machine's control panel. The threaded portion of the switch extends approximately 14mm, accommodating panel thicknesses up to 10mm or 0.39 inches, with the nut partially threaded.

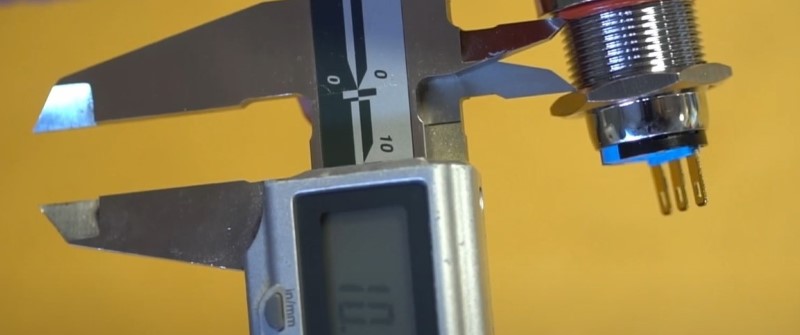
Constructed predominantly from durable metal, this ESTOP button guarantees longevity and resistance to wear. Only the lead connections and the o-ring feature high-quality plastic for optimal functionality. The switch offers versatile wiring options with three leads: NC (Normally Closed), NO (Normally Open), and C (Common). In the NC configuration, the NC and C leads remain connected until activation, at which point they disengage. Conversely, in the NO setup, the NO and C leads are initially separate, establishing a connection only upon the button's activation. This versatile, easy-to-install emergency stop switch is an essential addition for enhancing the safety and operational efficiency of your CNC machinery.

Ultimate Guide to Limit Switches, Proximity Sensors, and Emergency Stop Switches.

Video to connect an E-Stop to the pokeys57CNC controller:For Mach4

For Mach3

Video to connect limit switches to the Mach3 USB controller (same wiring for e-stops):

Ask a question about the Small All Metal E-Stop (Emergency Stop) Button:
Previously answered questions:

Click on the question to reveal the answer.
No previous questions. Be the first to ask a question about this product.
----
Related Tutorials
thumbnail for assembling CNC closed-loop electronics for a customer Assembling Closed-Loop Electronics with a 7.5kW Spindle
Watch this video to learn about the assembly process of closed-loop CNC electronics, including component arrangement, wiring considerations, and challenges faced. Discover valuable insights and tips for ensuring proper functionality and effective shielding.
Howard Royster's mirror bucket showing 3D design and assembly techniques learned from BuildYourCNC.com Howard Royster's Telescope Mount
Howard managed to learn the principles of CNC motion electronics and adapt them to build a very impressive telescope mount. The structural parts you see in the video were constructed on Howard's custom-built CNC which he sourced from BuildYourCNC. This is an excellent example of scientific prototyping and we are thrilled that Howard took the time to write to us and share his project. Here is the summary of the project in Howard's words.
Laser mirror alignment Laser Mirror Alignment Tutorial for Vertical Laser XL
In this series we'll be explaining how to align the laser mirrors on your Vertical Laser XL machine. Note that these techniques can also be used for alignment on the blackTooth laser cutter and engraver.
--
Get Help with:
This Product
Orders
Tech Support
Sales
This Product
Order Query
Tech Support
Sales
Not logged in. Log In Register
Track Order(s)
View Order(s)
I Want to Schecule a One-On-One Paid Tech Support Session
Book an Appointment Pertaining to a BuildYourCNC Product (Free)
Ask a Quesion Below (Free):
Book an Appointment Pertaining Other Equipment ($60/half hour)
Book an Immedite Appointment Pertaining Other Equipment ($120/half hour)
Ask a Quesion Below (Free):
Waiting for response... I may not answer immediately, but I was notified on my cellular phone so my response is forthcoming. If I don't respond immediately, you can always go to the [My Account] page to see all of our chats at any time.