Cutting plexiglass with our Vertical Laser XL 4'x8' laser cutter and engraver. I demonstrate the laser cutting process and show some of my parameters on cutting plexiglass effectively using the 80 watt laser cute in this large laser cutter.
This is a quick demonstration of cutting plexiglass (also referred to by Plexiglas) with the Vertical Laser XL.
I'm using LaserCAD V7.58 for this demonstation and is the current version during the making of this video. The dimension of the Vertical Laser XL in millimeters is approximately 1200mm x 2400mm.
I am cutting out a plexiglass panel which is one out of about nine that I am using for a project I am working on. The plexiglass is approximately .21" or 5.5mm in thickness. For the cut parameters, I'm using a maximum laser power of 80% and a minimum power of 50% with a speed of 7 mm/s.
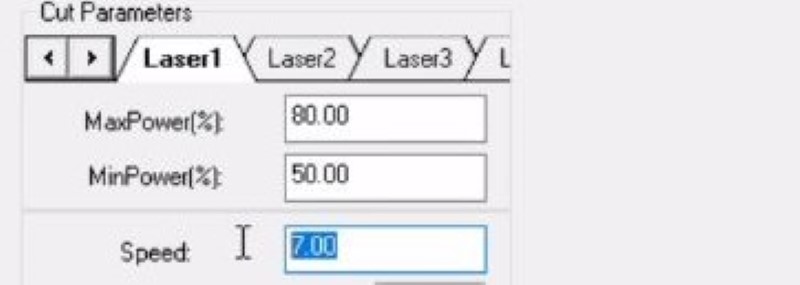
The cut depth will be a balance of the maximum laser cutting power and the speed of the laser cutting process. For example, if you go twice the speed, you can expect to cut only half way through the material as the laser cutter doesn't have enough time to cut all the way through.
In this case, 7mm/s (millimeters per second) is a bit slow, but I wanted to make sure that I was able to cut all the way through the plexiglass on the first pass. I'm using 80% rather than 90% or 100% because I want to maximize the life of my laser tube.
The line work (geometry making up the square panel and the four circles to serve as screw holes) is on the black color layer. The layers can be selected at the bottom of the Laser CAD interface. This layer is labeled "cut" since the laser will follow this geometry and cut along the geometry.
In order for the Vertical Laser XL Laser Cutter to cut the plexiglass according to the geometry, the file (the geometry and layers to serve as instructions) need to be transferred to the Vertical Laser XL Laser Cutter's laser controller. There are two ways to do this and both require you to click on the "Download" button on the right of the LaserCAD user interface. A "Download Document" dialog box appears with two main buttons for transferring the file to the Laser Cutter. My favorite way is to connect my computer to the laser controller and click on the "Download Document" button. This will also make that file the default file in the Laser Cutter's controller and be ready to process the file immediately. This will transfer the file directly to the Laser Cutter's controller.
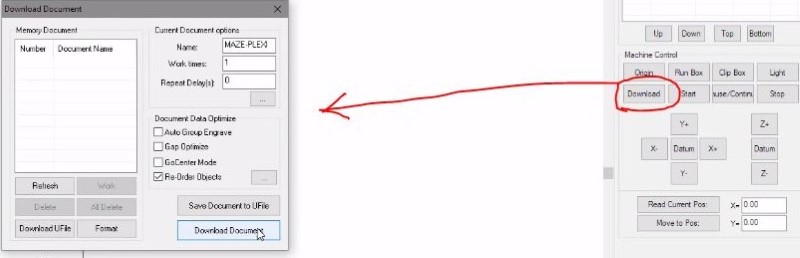
Alternatively, you can transfer the file first to a thumb drive (USB stick or flash drive) and then plug the thumb drive to the laser cutter's controller and select the file from the laser cutter's control panel.
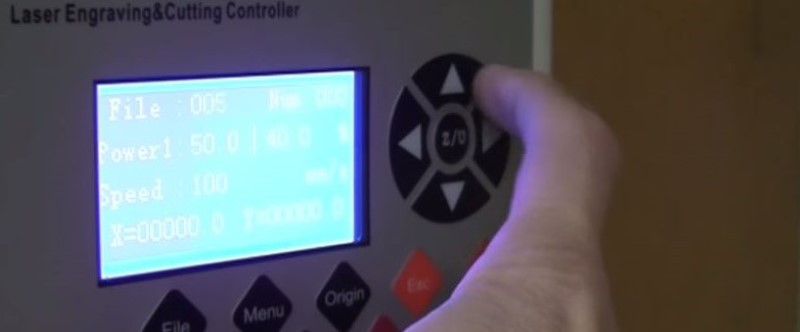
After I turn on the vertical laser and its supporting devices (chiller, vacuum, compressor) I will generally move the nozzle to a position that I want to start cutting. In my configuration, this is the lower left corner of the geometry. Once this position is set, I will press the "Origin" button on the Laser Cutter's control panel which will set its key origin. I then press the "Test" button which moves the nozzle around the geometry (a rectangular movement) so you can determine the general area that the cutting will be done on the work piece. The test button is a good feature to use to make sure the cutting or engraving will be done on areas of the work piece you would expect.
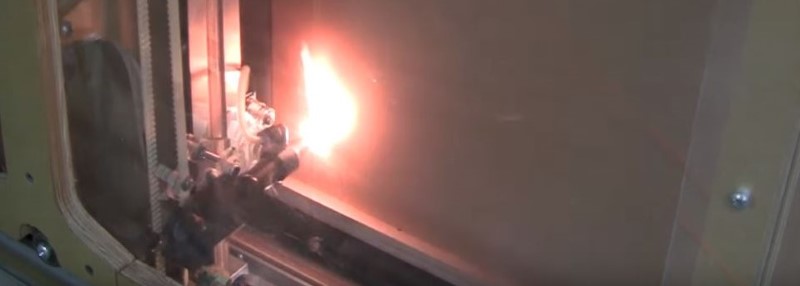
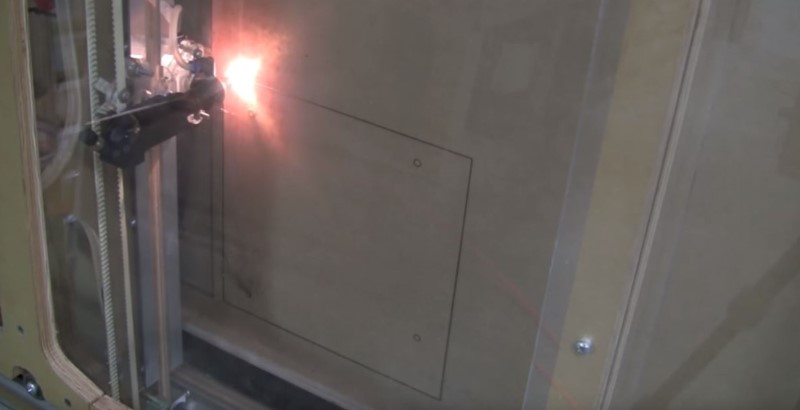
This is what happens if you don't turn on the compressor. An air compressor is extremely important in these laser cutting machines. The compressor is used to primarily extinguish flames and flare-ups at the lasing location and remove as much carbon as possible when lasing materials that char. Air from the air compressor provides airflow at the nozzle and I generally set the compressor to output about 20 psi.
I quickly stopped the process when I noticed the flame at the lasing location. The laser cutter can be stopped quickly using the "Stop" button on the laser cutter's control panel. I turned the compressor on and the lasing now shows a very intense light at the cutting location.
The controller will optimize the cutting process, cutting the geometry located near the center and working outwards. This process can be overridden if desired, but I like how this works.
Before using this or any laser cutter and engraver, make sure you wear your protective gear (protective eyewear for CO2 laser wavelength). The door of the machine should be closed and you are not looking directly at the light as the light at the cutting location is so intense that it can be bothersome and probably dangerous (similar to the light from welding). Always have a fire extinguisher nearby for this and all laser cutters. The plexiglass used on the doors of these laser cutters are highly flammable.
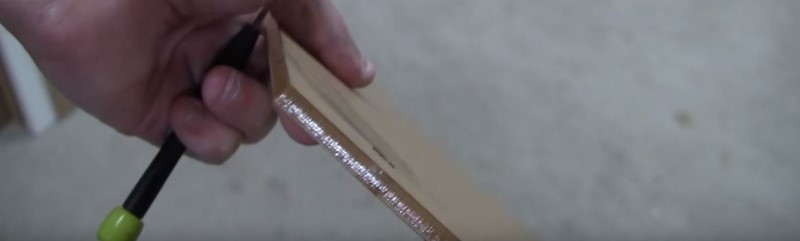
This is what the finished piece looks like without the plexiglass protective covering removed. In contrast to CNC Router cutting pleiglass, the laser cutter leaves the edge shiny and transparent and the CNC router gives it more of a frosted look on the edge.
I hope this helps in your plexiglass cutting. Thank you for coming by and checking out this tutorial.